Unattended Provisioning - CentOS Linux
Unattended Installation means Operating System installation without any user intervention. Foreman by default is shipped with all the things required to do a complete unattended install of major Linux distributions. We will be setting up an unattended environment which will require access to resources on the LAN itself for the most part.
We will start with global configurations and then move on to OS specific settings.
Pre-Requisites
Infrastructure
Smart Proxies
Smart-Proxies are the most important part for unattended installs. Ensure that the previously configured smart-proxies are running before moving further. See Pre-Requisites for more information.
Compute Resource
The Compute Resource is necessary for Foreman to be able to interact with the VM Hypervisor and manage the state of Virtual Machines. It will be contacted to create/delete/modify hosts.
We will be using the VMWare compute resource, but first the plugin will have to be installed. On the foreman CLI:
yum install -y foreman-vmware
##Restart Foreman to activate the Plugin
systemctl restart httpd
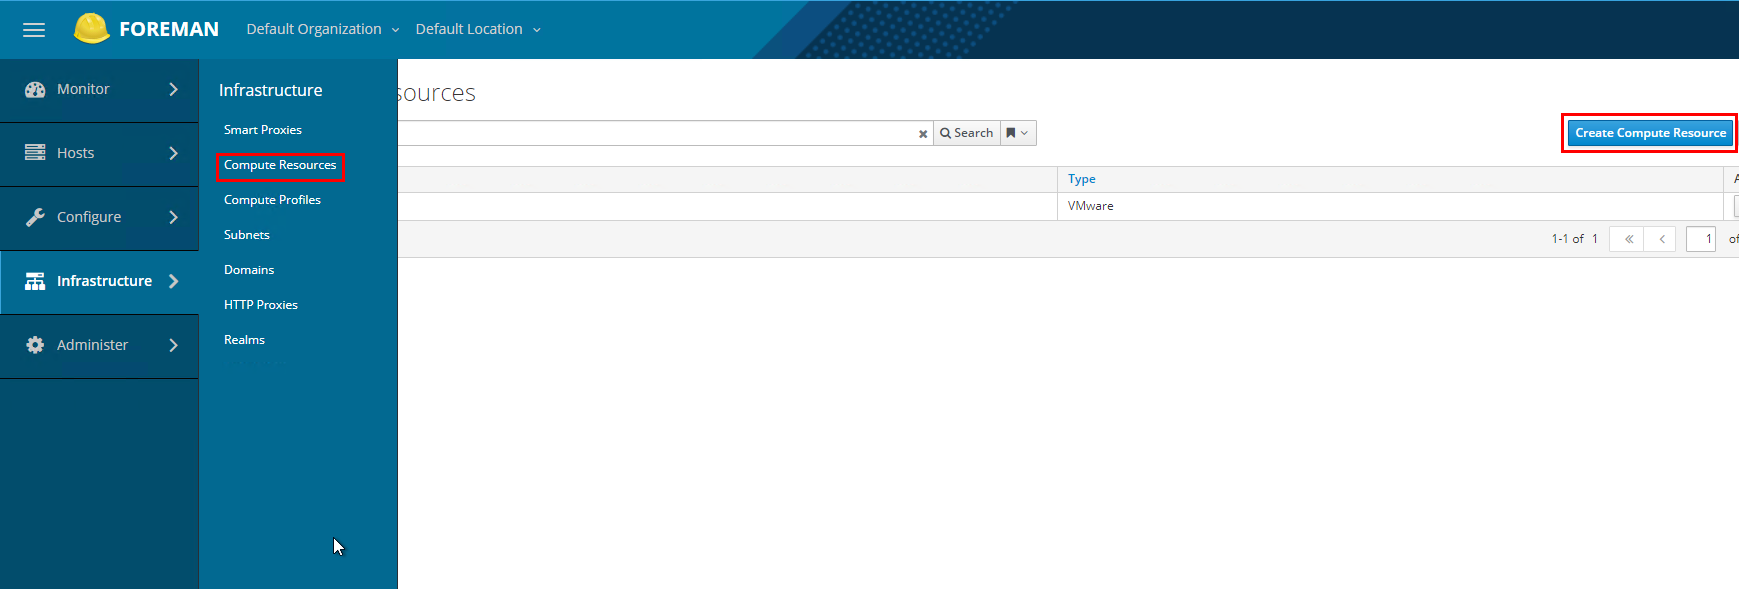
- On the Foreman Web GUI, Infrastructe>Compute Resources>Create Compute Resource.
- Enter the information for the vCenter appliance. Click Test Connection after filling in the credentials and it will pick up the available datacenters.
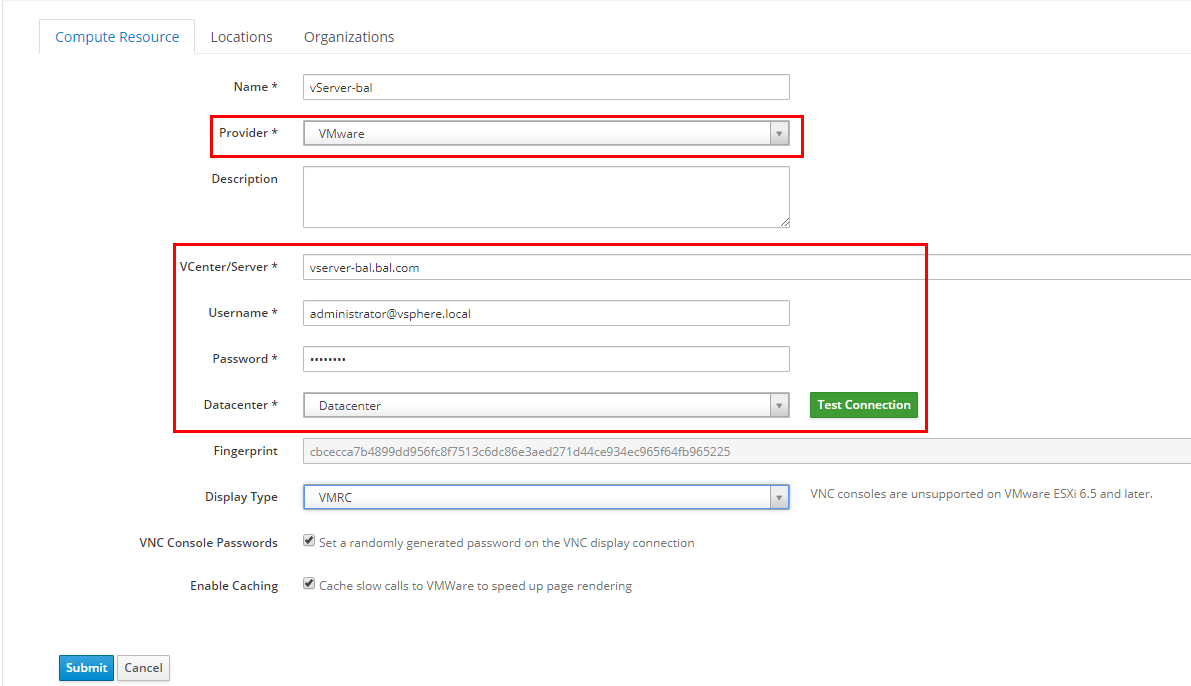
- Select the Default location and Organization or the desired one if there’s multiple. Submit.
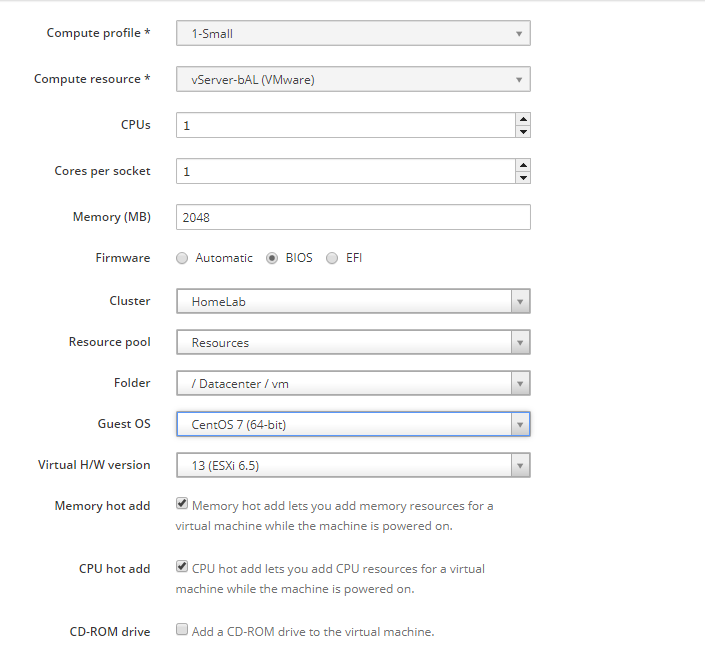
- Select the added Compute Resource. Under Compute Profiles, select 1-Small.
-
Pre-define the VM settings to be used at the time of creation of instance on vSphere.
Domain
Domain information is needed to create proper host entries in DHCP and DNS, and also for the host names. The domain will automatically be added as a suffix to the VM’s name.
- Infrastructure>Domain>Create Domain.
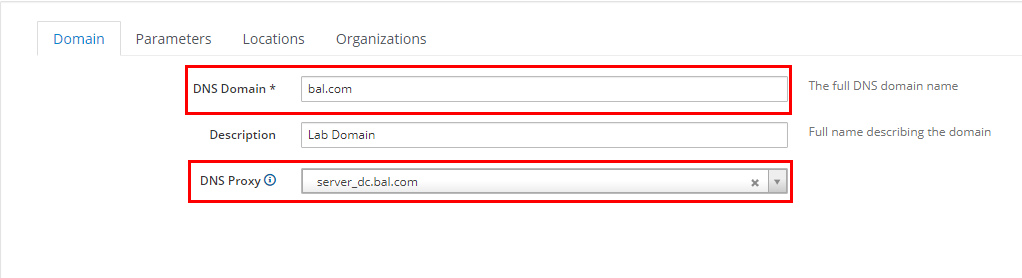
-
Enter the full DNS domain name of the network, and select the DNS proxy pointing to the DNS server responsible for this domain.
- Select the default location and organization. Submit.
Subnets
The network information is required by the DHCP smart-proxy to find unused IP addresses and assign it to a host. The network subnet can be the same as your network’s parent scope or you can segment it out by using a variable length subnet mask, but the DHCP server must have a scope which matches the network address entered here.
- Infrastructure>Subnets>Create Subnet.
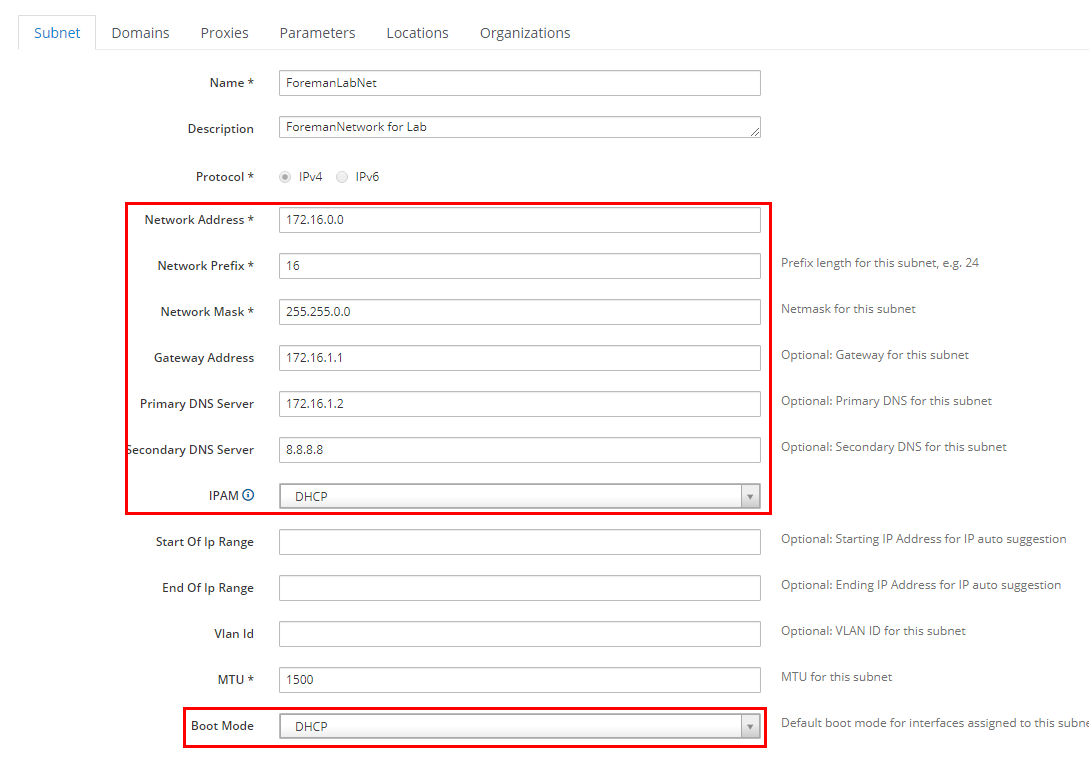
- Enter the information under the Subnet. Change the network address with your preferred network address and select DCHP for IPAM and Boot Mode. You can also enter the Start and End IP addresses for the DHCP proxy to look for unused IP addresses only in that range.
- On the Domain tab, select the domain created in the last step and move it to the right.
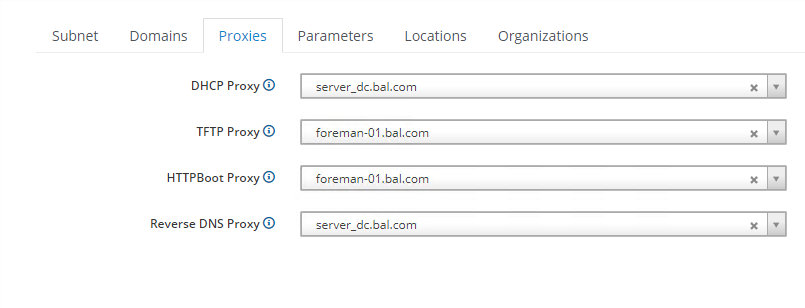
-
On the Proxies tab, select the proxies that you wish to use to serve the defined purposes. Note: Each drop-down will list only the proxy which supports the defined proxy feature.
- Select the default location and organization. Submit.
Provisioning Setup
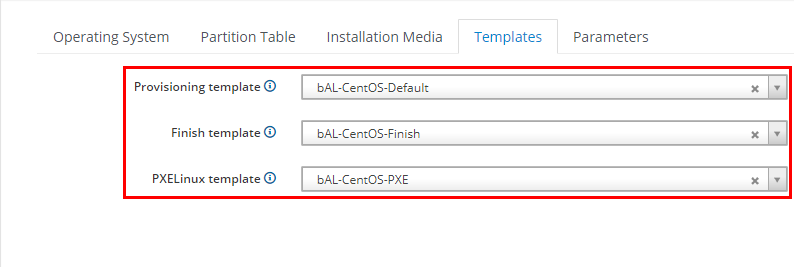
Provisioning Templates
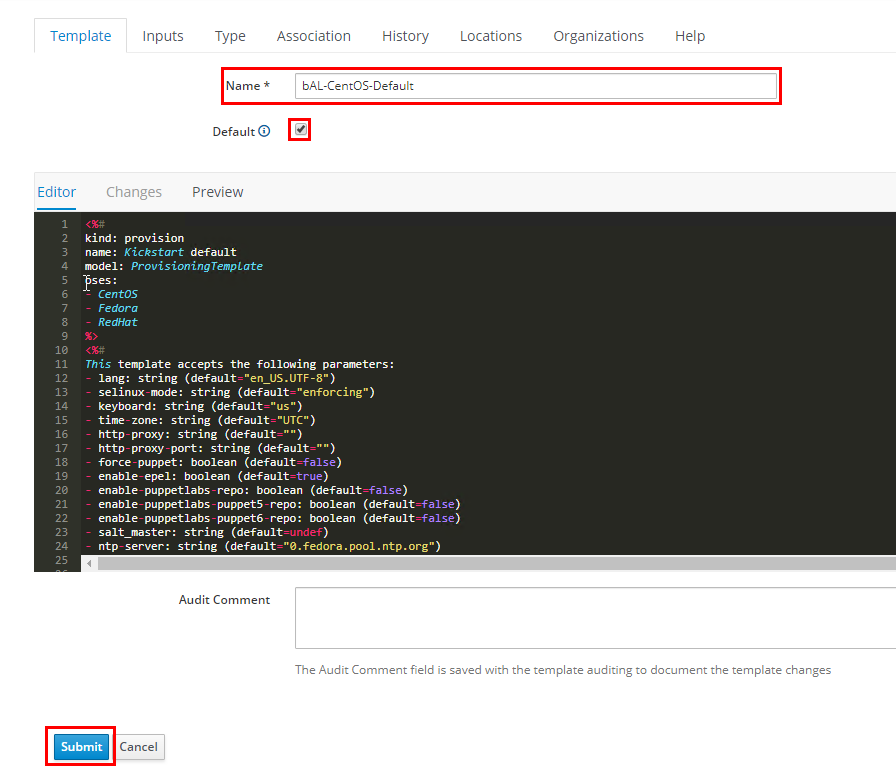
The Provisioning Templates are the core of Foreman’s flexibility to deploy the right OS with the right options. The templates we need are all pre-loaded and can be customized by using parameters. Pre-loaded templates cannot be edited, to do so they first need to be cloned to a new name. Templates are all written in ERB syntax.
The CentOS templates used are created from Kickstart scripts, with added ERB variables that can be customized though parameters. We will use the basic templates for the install.
-
Clone the Kickstart default, Kickstart default finish and Kickstart default PXELinux templates.

-
Type a new name and Submit. We will make changes in the next steps. Do the same for all the cloned templates.
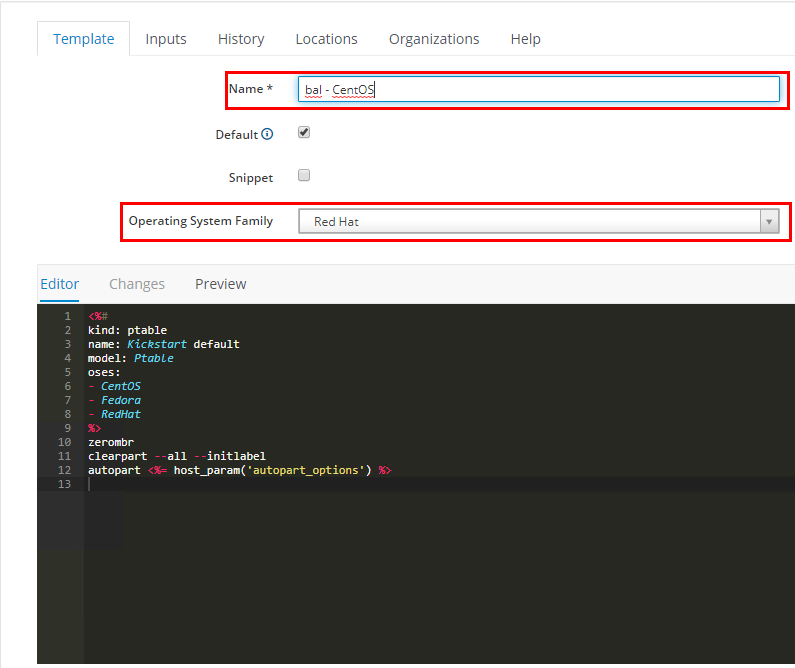
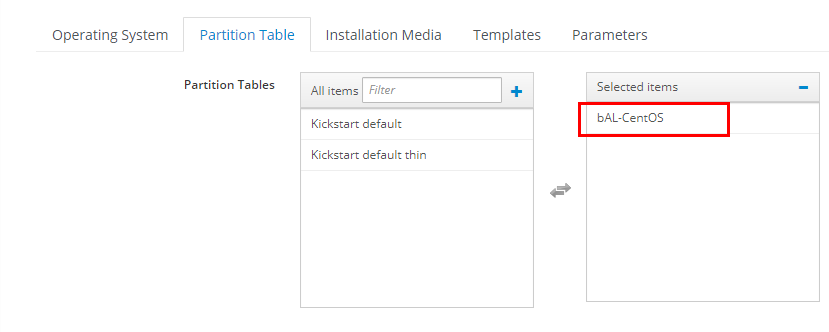
Partition Table
The partition table template contains a simple command to create the defined partitions.
- Clone the Kickstart default partition table.
-
Enter a new name, and select the OS Family as Red Hat. Submit.
Architecture
Create a new architecture for the host.
- Hosts>Architecutres>Create Architecure.
- Enter name as x86_64. Submit. It is possible that the architecture may already exists as Foreman also pulls its own reports and adds the findings to the database.
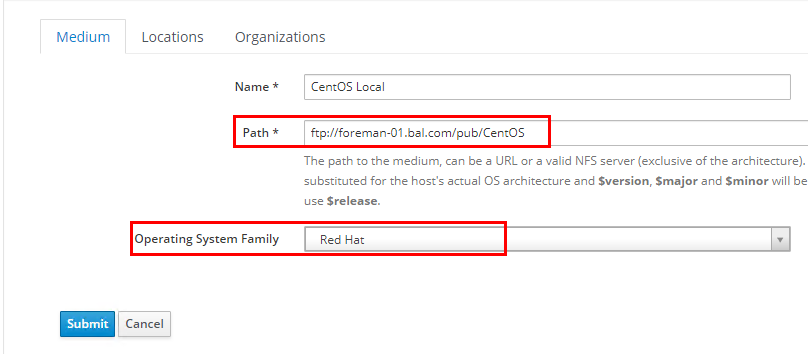
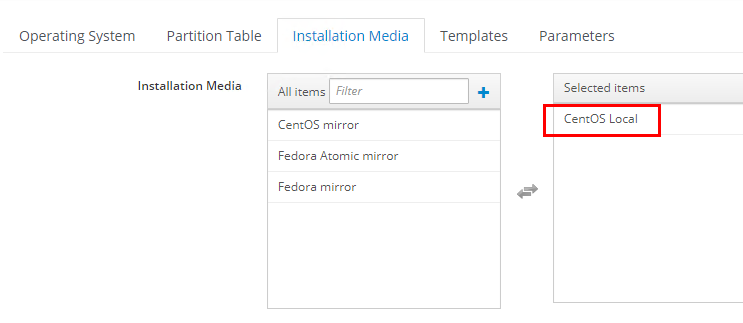
Installation Media
The installation media contains the Operating System files. When the OS is PXE booted, the PXE option menus direct the host to this URL for downloading the OS specific files. Foreman comes pre-loaded with the internet URL for the CentOS mirror. We will setup a local repository for the CentOS files on a Linux machine (This can be done on the Foreman server itself, and after you have done your first unattended install you can use that machine as the FTP server, which can be automated by Puppet, so many possiblites!!)http://centos.mirror.vexxhost.com/8.0.1905/isos/x86_64/CentOS-8-x86_64-1905-dvd1.iso
Setup Local Repository:
- Install vsftpd.
yum install -y vsftpd && systemctl enable vsftpd && systemctl start vsftpd - Download the latest CentOS ISO.
cd /tmp && wget http://centos.mirror.vexxhost.com/8.0.1905/isos/x86_64/CentOS-8-x86_64-1905-dvd1.iso - Mount the downloaded ISO and copy files to the shared location.
mkdir /tmp/CentOSmnt ; mount -o loop /tmp/CentOS-8-x86* /tmp/CentOSmnt ; cp -rf /tmp/CentOSmnt/ /var/ftp/pub/CentOS
Create Installation Media:
- Hosts>Installation Media>Create Medium.
-
Add the FTP address of the extracted folder. Select OS family as Red Hat.
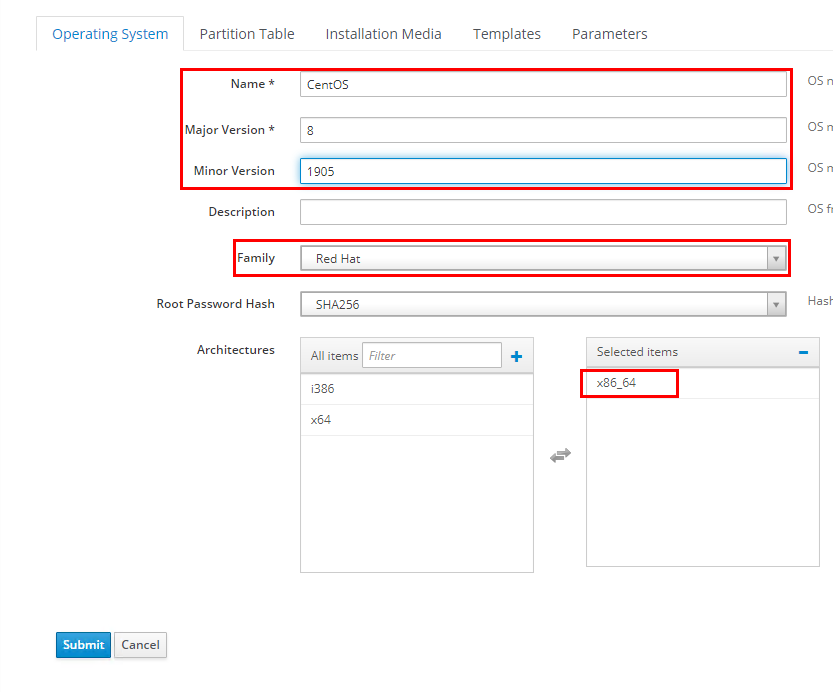
Operating System
The Operating System section brings all different OS specific configurations together. We will create a new operating system resource for CentOS 8.
- Hosts>Operating Systems>Create Operating System.
-
Enter the OS details, family and select the architecture. This information must correct as it will be by the Provisioning Templates.
-
Select Partition Table.
-
Select the Local installation Media.
- Submit.
- We will now setup the association between the Provision Templates and Operating System.
- Go to Hosts>Provisioning Templates>NewTempalteName>Association. Select the newly added Operating System and move it to the right. Do this for all the three cloned templates.
- Back to Hosts>Operating Systems. Select the newly added OS.
-
Under Templates, select all the relevant templates and complete the association by clicking Submit.
Provisioning
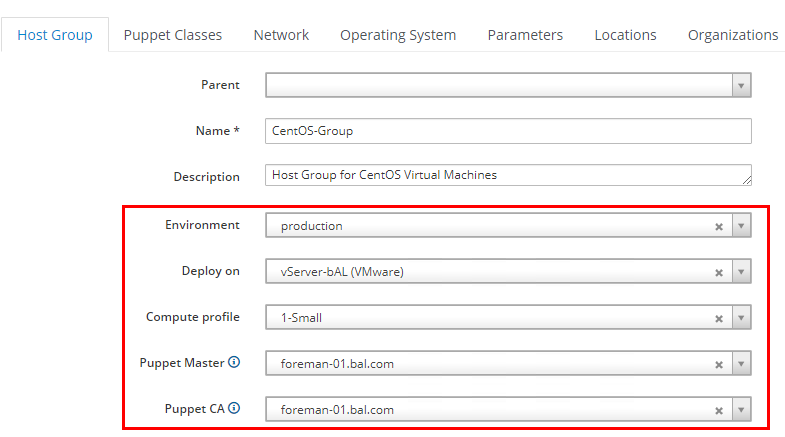
Host Group
Before, we go ahead and create the new host, let’s first create a Host Group and this will minimize the requirements to be filled on the New Host page. We will just add the new host to the Host group and rest of the information will be automatically filled.
- Configure>Host Groups>Create Host Group.
- Enter the information created in the previous sections under all tabs.
-
Host Group:
-
Network:
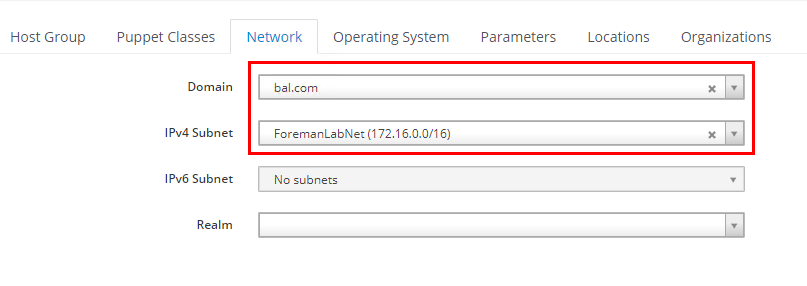
-
Operating System:
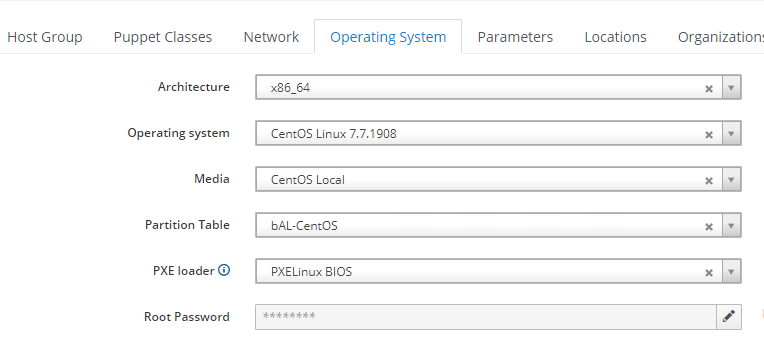
Set the Root Password. The PXE loader selection determines the PXE config file to be used for the instance. This file is then added to the instance’s directory under pxelinux.cfg directory.
-
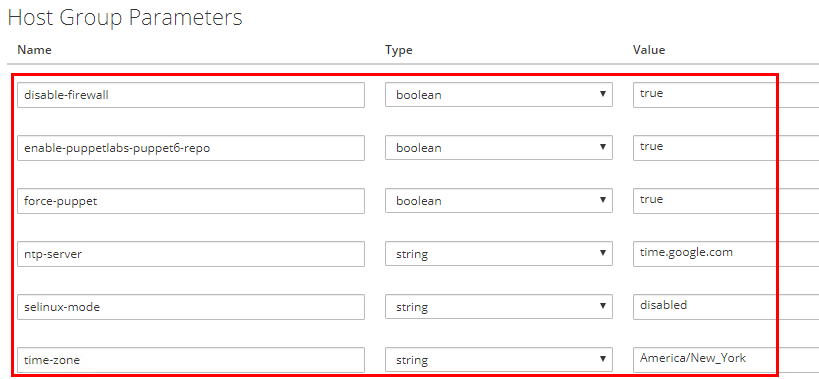
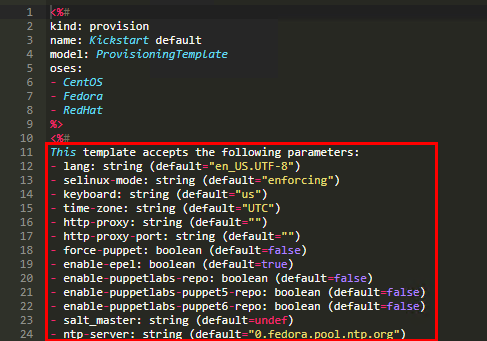
Parameters are user defined properties. The parameters that a template accepts are mentioned in the template code. We will add some custom settings which will then be set inside the template during provisioning.
Following is an example of a Template which lists the parameters it accepts:
-
Submit.
-
Create Host
- Hosts>Create Host.
-
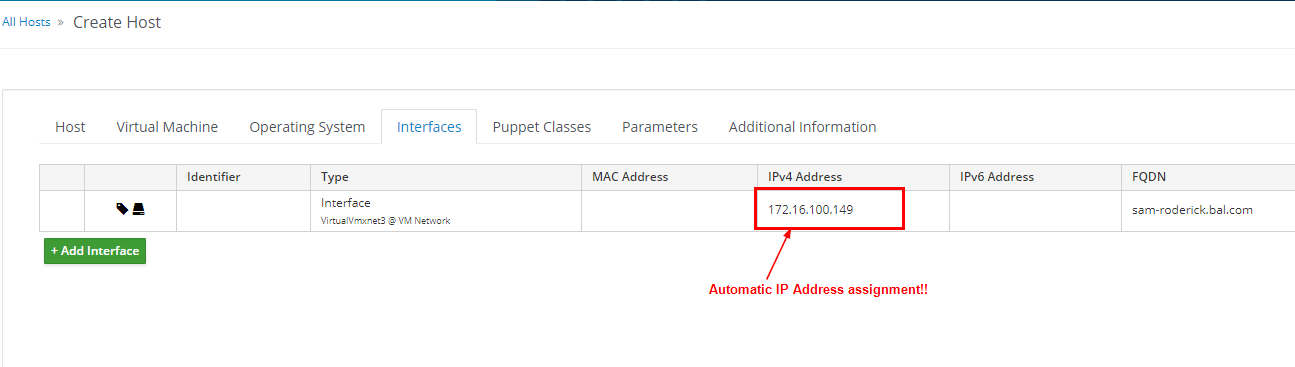
Enter the Hostname. Select the Host Group and it should automatically fill in all the information under all tabs.
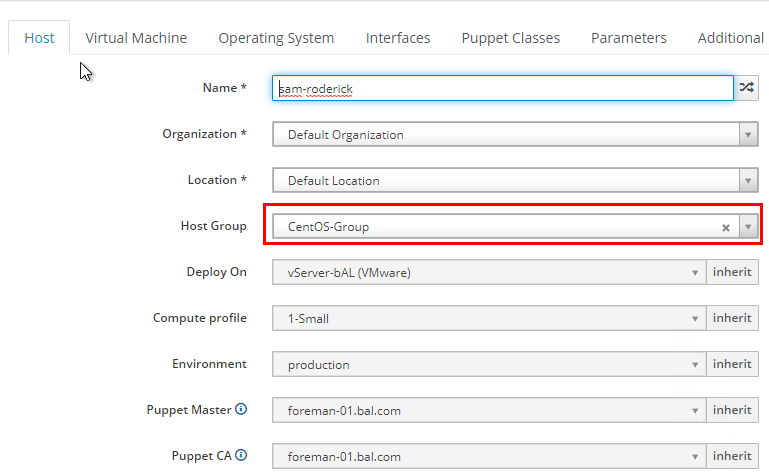
- Submit.
-
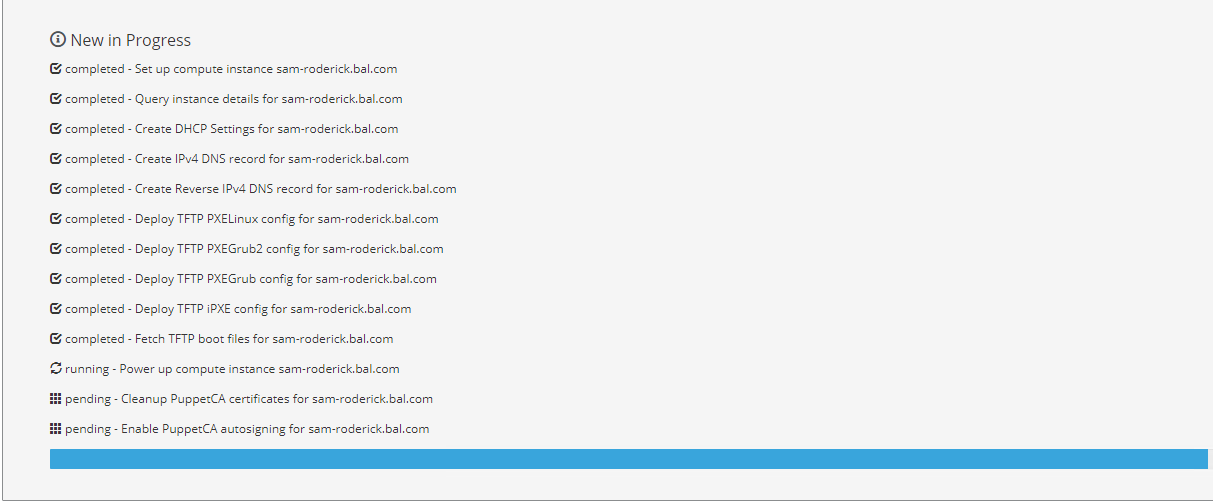
Foreman starts the build process.
Additional Configurations
Disable Root User
To disable the root user, and instead create another system user with root permissions:
- Host>Provisioning Templates. Select your provisioning template that was cloned from Kickstart default.
-
Replace line 84 with the following. Replace the user name with your specification. The root password will be the one entered during the Host Group creation.
user --name=myadmin --groups=wheel --iscrypted --password=<%= root_pass %>Original Line:
rootpw --iscrypted <%= root_pass %>
Enable Puppet6
The URL to download the Puppet 6 repository inside the puppetlabs6_repo snippet which is called from the provisioning templates is wrong. To correct the error and enable Puppet 6 edit the puppetlabs6_repo snippet followed by the addition of paramter in the Host Group as show in the previous seciton.
- Hosts>Provisioning Templates>puppetlabs6_repo
-
Change the repo_name and repo_subdir in the Puppet 6 section as follows:
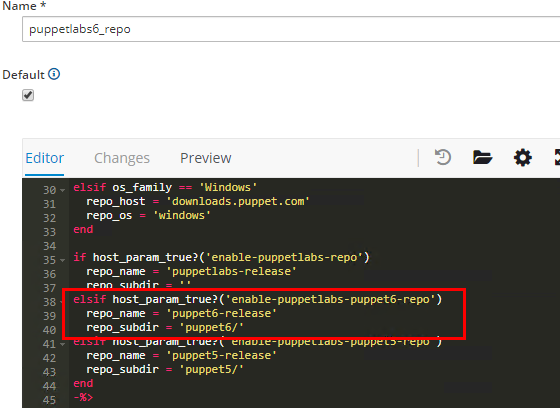
The Hosts should now be provisioned with an updated version of Puppet.