Foreman and Smart-Proxy Installation
Foreman is an open source project that helps system administrators manage servers throughout their life cycle, from provisioning and configuration to orchestration and monitoring. Provisioning support gives you easy control of setting up new servers, and using configuration management (Puppet, Ansible, Chef and Salt are supported), you can easily automate repetitive tasks. With Foreman, you can quickly deploy applications, and proactively manage change, both on-premise with VMs and bare-metal or in the cloud. Foreman scales well to multiple locations (offices, data centers, etc) and multiple organizations, allowing you to grow without losing your single source of infrastructure truth.
Install Foreman with Puppet Master
- Perform a clean installation of a CentOS system. Make sure that you have sudo access to the system before moving on to the next steps.
- For simplicity’s sake, disable firewalld and SELinux. This can be enabled later after having a working setup.
systemctl stop firewalld
systemclt disable firewalld
vi /etc/selinux/config
	#change the SELINUX= value to disabled
	SELINUX=disabled
- The foreman installer requires puppet. Foreman installations depend upon a back-end database, which is installed as part of the installer. Enable the required repositories for Puppet and Foreman.
sudo yum -y install https://yum.puppet.com/puppet6-release-el-7.noarch.rpm
sudo yum -y install http://dl.fedoraproject.org/pub/epel/epel-release-latest-7.noarch.rpm
sudo yum -y install https://yum.theforeman.org/releases/1.23/el7/x86_64/foreman-release.rpm- Install and run the foreman-installer. Additionally, if this server is being setup as a sub-node to a Master Puppet/Foreman server or it only requires select functions to be installed, you can choose to pass command line arguments to the installer command. More information for doing an interactive/custom foreman installation can be found here. A full foreman install includes all the packaged Proxies, Puppet and Foreman.
sudo yum -y install foreman-installer
sudo foreman-installer
When the installation is complete you should have a message similar to:
* Foreman is running at https://foreman-01.mydomain.com
    Initial credentials are admin / d8fds39fjd2Fdo
* Foreman Proxy is running at https://theforeman.example.com:8443
* Puppetmaster is running at port 8140
The full log is at /var/log/foreman-installer/foreman-installer.log
In it’s default configuration:
- Foreman Server runs on port 443(HTTPS).
- Foreman-Proxy runs on port 8443. All connections made to a destination foreman proxy are at port 8443.
- Puppet Master server runs on port 8140.
Foreman Configuration -> /etc/foreman/settings.yaml
Ensure the following options:
:unattended: true
# The following option is by default set to true, but to make
# Windows deployment easier later in the guide, we will set it as false.
:require_ssl: false
:puppetrun: false
Use the same certificates and keys generated by puppet ,for both the Websockets and SSL-settings.
The following components are now up running on the CentOS VM:
- Puppet
- Puppet CA (Puppet Certificate Management Server)
- TFTP
- Foreman
- Foreman-proxies (pre-configured Puppet, Puppet CA and TFTP).
Next, we will install and configure the DHCP and DNS proxies on Windows Server 2019.
Install MS DNS & DHCP Smart-Proxy on Windows Server
In order to use Microsoft DNS and DHCP services in conjunction with Foreman, a smart-proxy must be installed on a Windows machines strictly, and configured to be talking to the MS Servers and Foreman. It is not essential for the proxy to be on the same machine as the DNS/DHCP servers, but it must be a Windows Server Host. Following are the steps to install Windows Smart-Proxy.
- Download the latest available Ruby+DevKit package for Windows from this link.
-
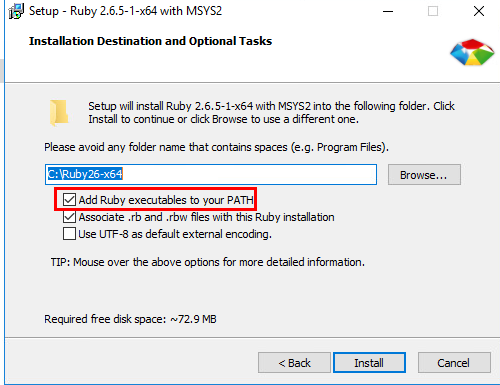
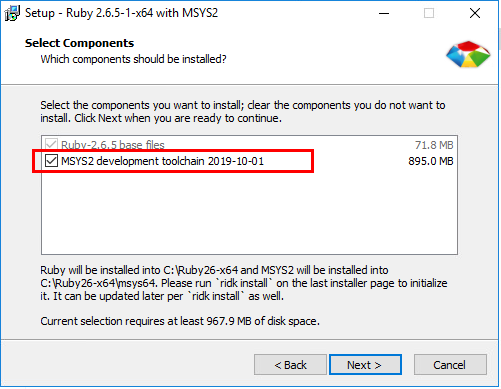
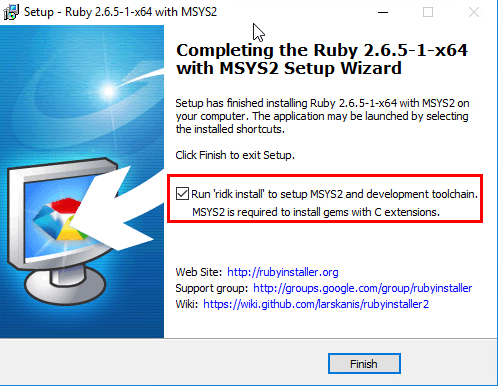
Run the installer, and specify the following:
-
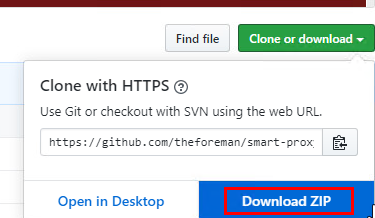
Download/Clone the Smart-Proxy from the git source.
- Extract the Downloaded ZIP file to C:\smart-proxy-develop.
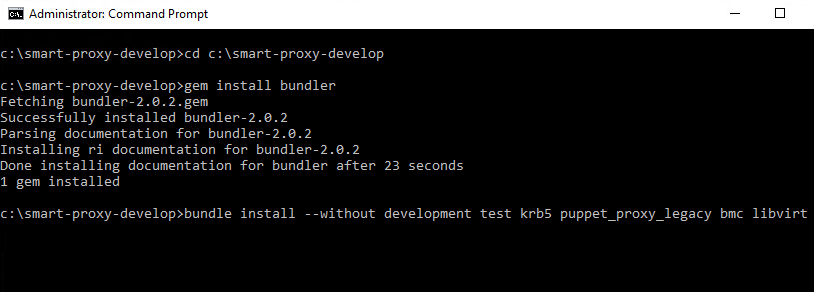
- Next, open an administrative Command Prompt and run the following commands to complete the installation.
cd c:\smart-proxy-develop
gem install --no-ri --no-rdoc bundler
bundle install --without development test krb5 puppet_proxy_legacy bmc libvirt
Configure Windows Smart-Proxy
-
Generate Certificates for the smart-proxy on the Puppet CA server.
puppet cert generate server-proxy.mydomain.com -
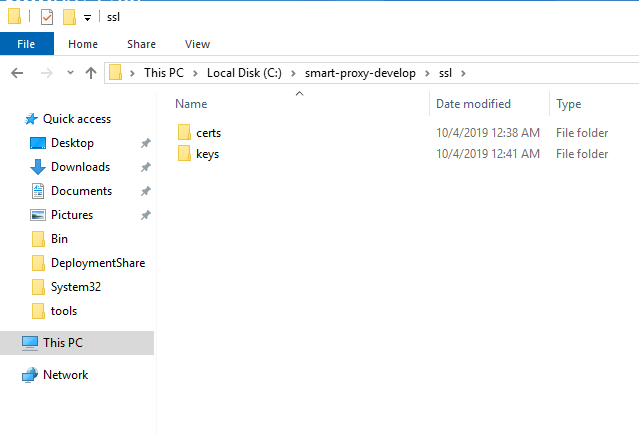
Copy the proxy’s private key and certificate file plus the ca.pem file from the Puppet Master to a location on the Smart Proxy server(
C:\smart-proxy-develop\ssl)/etc/puppetlabs/puppet/ssl/certs/server-proxy.mydomain.com.pem/etc/puppetlabs/puppet/ssl/certs/ca.pem/etc/puppetlabs/puppet/ssl/private_keys/server_dc.mydomain.com.pem -
Run the following commands in a command prompt to create valid configuration files for the feature to enable, which we will later edit.
Note: If you wish to enable any other features than DHCP and DNS on this proxy simply remove the .example part from the appropriate config file for that feature.
cd c:\smart-proxy-develop\config cp settings.yml.example settings.yml cp settings.d\dhcp.yml.example settings.d\dhcp.yml cp settings.d\dhcp_native_ms.yml.example settings.d\dhcp_native_ms.yml cp settings.d\dns.yml.example settings.d\dns.yml cp settings.d\dns_dnscmd.yml.example settings.d\dns_dnscmd.yml -
Make changes to the newly created configuration files as desired. Following examples only show the changes:
-------settings.yml------- :ssl_certificate: C:\smart-proxy-develop\ssl\certs\server-proxy.mydomain.com.pem :ssl_ca_file: C:\smart-proxy-develop\ssl\certs\ca.pem :ssl_private_key: C:\smart-proxy-develop\ssl\keys\server-proxy.mydomain.com.pem #Enter the value for the Foreman Server :foreman_url: https://172.16.1.9 ---------dhcp.yml--------- :enabled: true :use_provider: dhcp_native_ms #Enter the DHCP Server IP Address :server: 127.0.0.1 ---------dns.yml---------- :enabled: true :use_provider: dns_dnscmd -
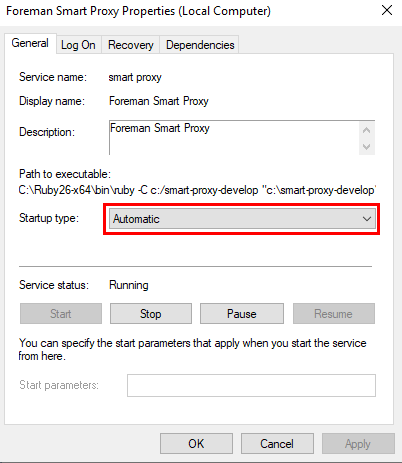
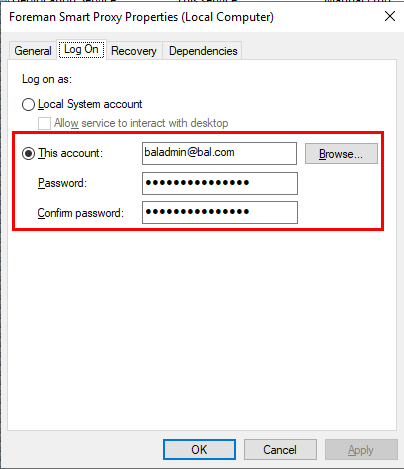
Register the Smart-Proxy daemon as a Windows Service and enable it to run on boot.
-
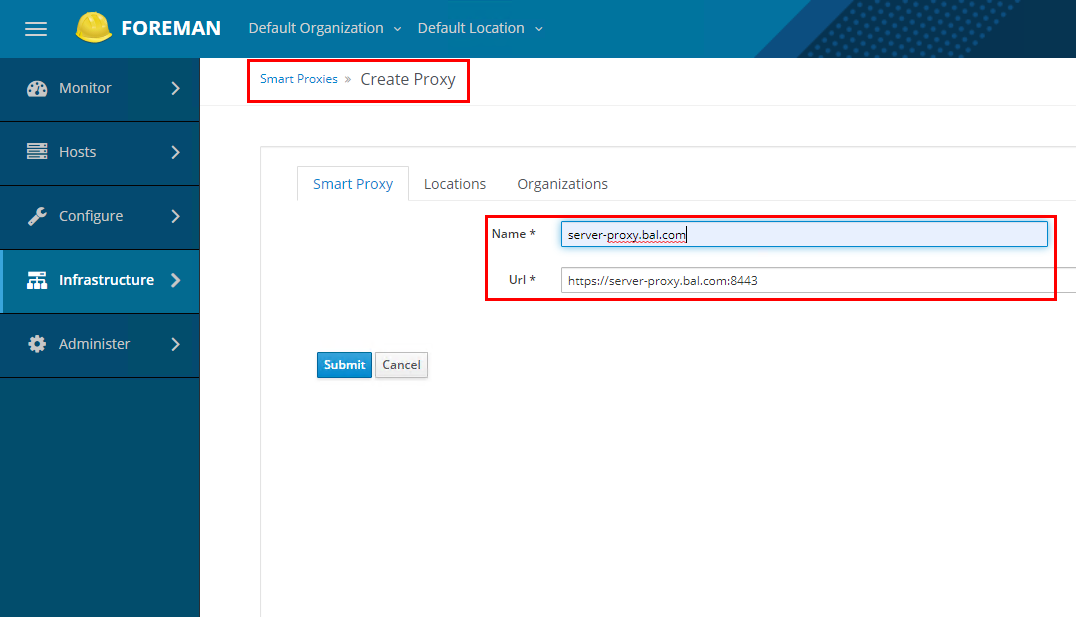
As the last step, add the Proxy to the Foreman Server.
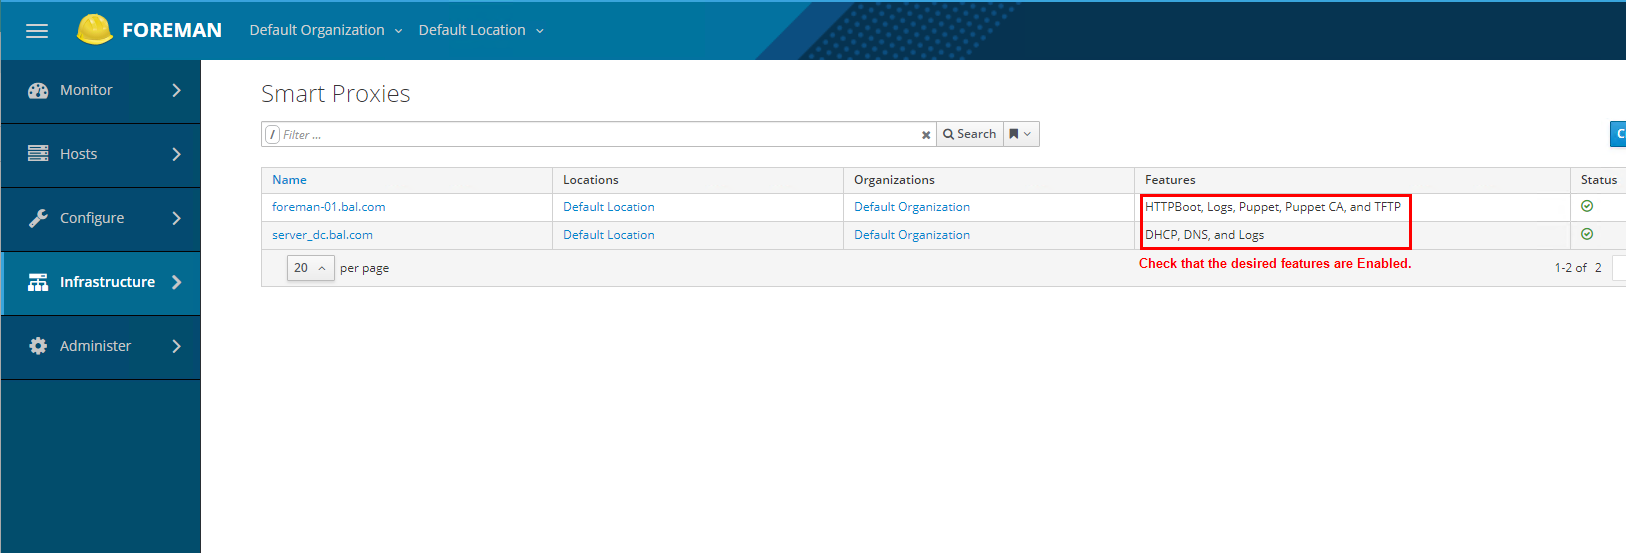
Smart-Proxy Status:
