WireGuard VPN Setup on AWS LightSail
WireGuard is an easy to use and secure VPN tunneling protocol. It utilizes UDP as it’s communication protocol. The overhead carried by WireGuard’s encryption+encapsulation is very low as compared to other well-known VPN protocols like IPSec, SSL-VPN, which makes WireGuard’s performance far superior than it’s counterparts.
WireGuard is supported across all modern operating systems: Linux, Windows, MacOS, Android, iOS. This provides great interoperability across operating systems as the configuration is pretty straight-forward and similar for all systems.
Why Build your own when there are so many commercial VPN providers?
The primary reasons you would want to run your own VPN server:
- Have control and visibility into your network traffic, such as the geo-location you want to use the VPN from.
- Ensure privacy and security. Although VPN providers claim that customer data is kept secure and private, it is hard to verify how much truth is in this statement. With WireGuard, you are in control of the server the VPN runs from, and as long as the server is secured from unauthorized access, you can be assured of the network’s security.
AWS Lightsail is a low-cost and reliable VPS service provided by AWS. The first three months of service are free for new users. Multiple regions are available to create the instances in. There is no official number that AWS has documented on the maximum/minimum bandwidth on LightSail instances, however, during my testing, I have been able to get close to 100Mbps upload/download with little variation. This is more than enough to run VPN services for a small number of users.
Provided all these benefits, we will be setting up WireGuard on AWS Lightsail.
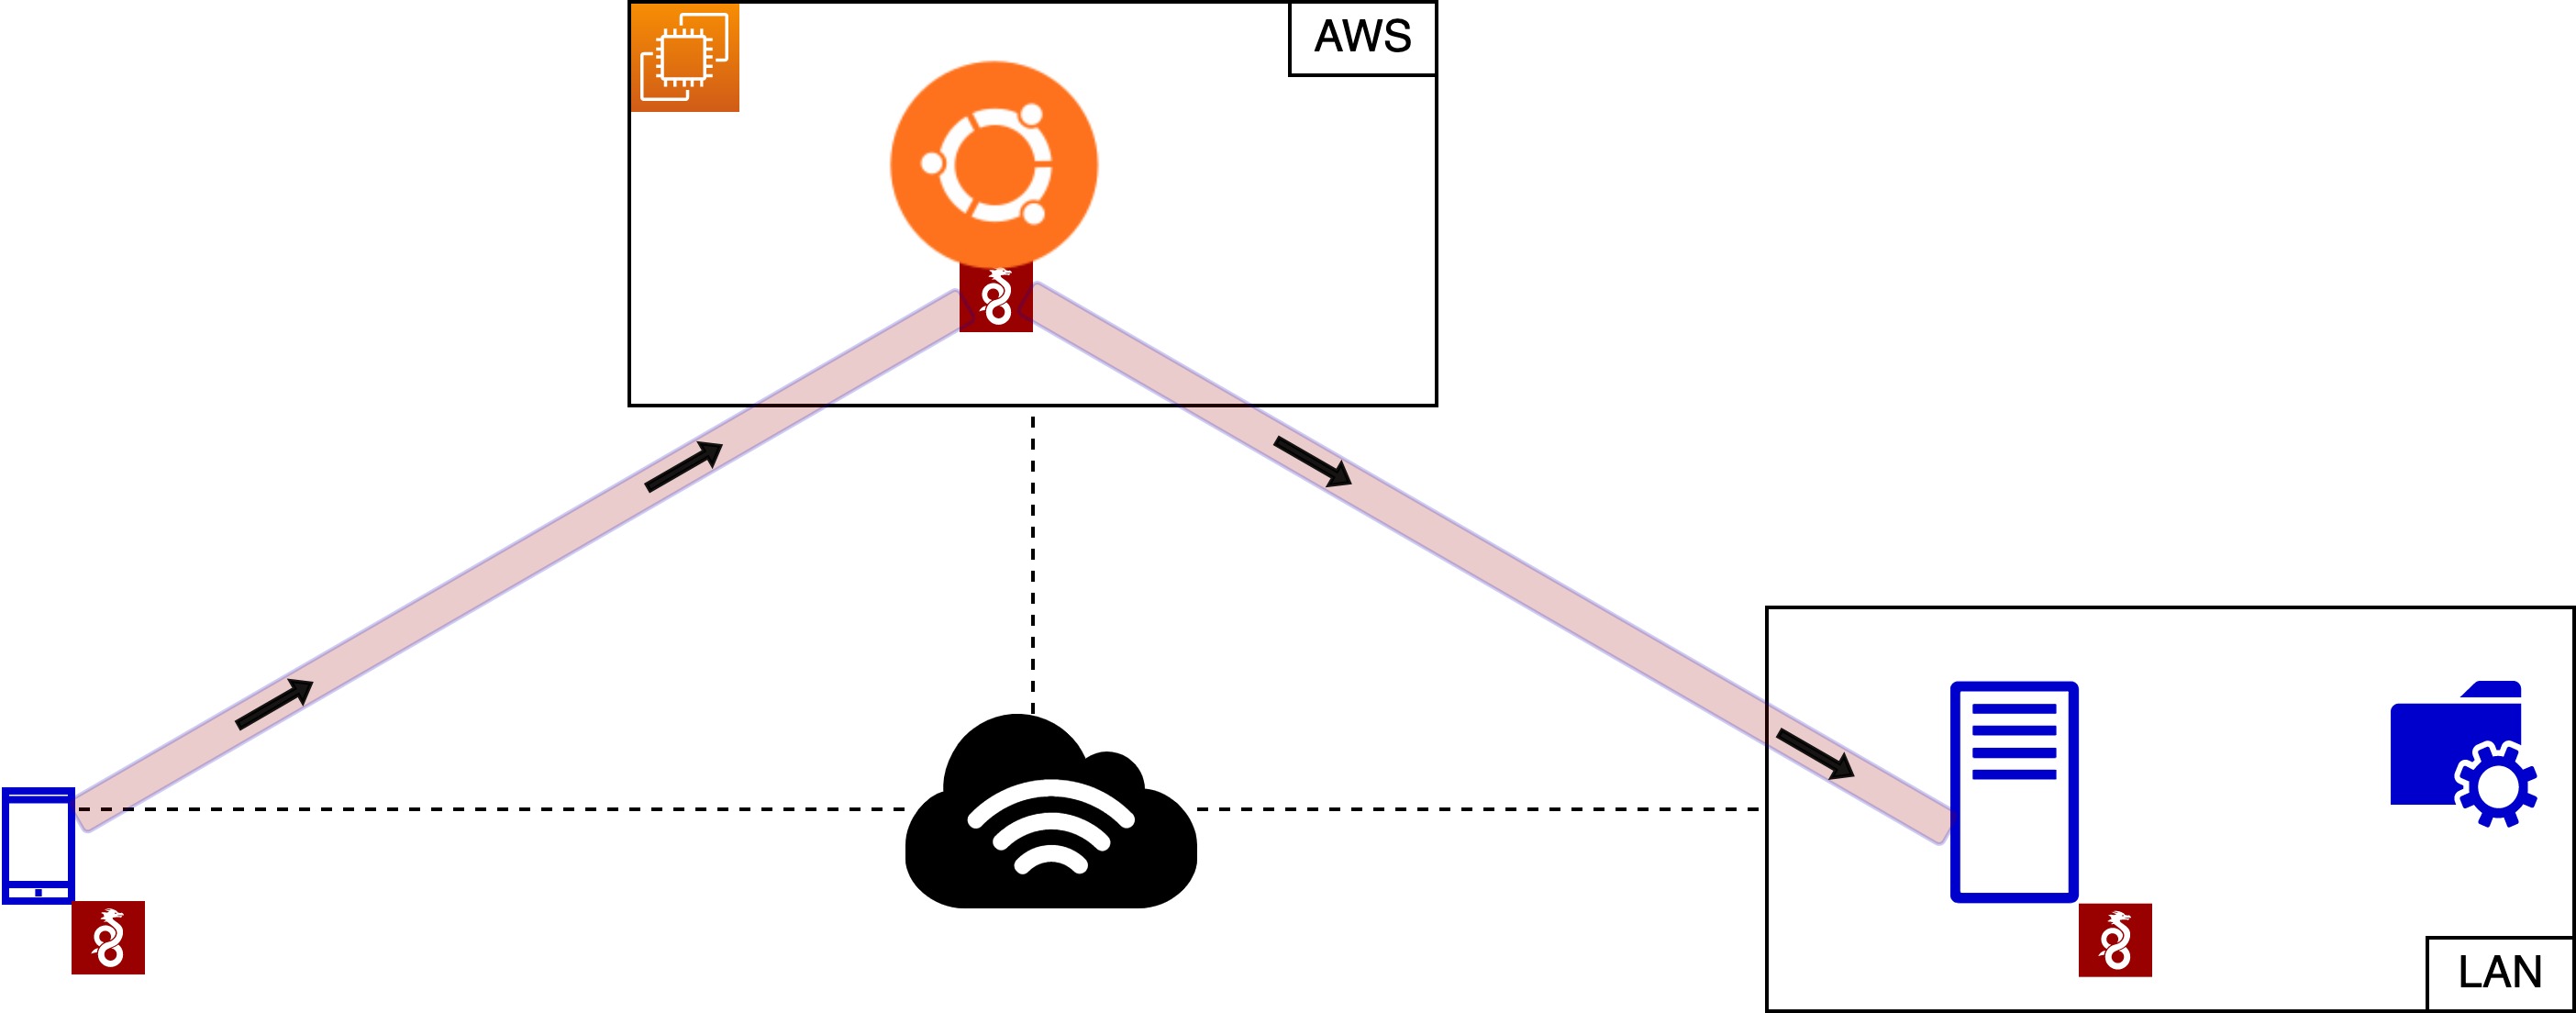
Network Topology
- AWS LightSail: Ubuntu 20.04 (512MB Memory, 1 vCPU)
- Home network with a server running WireGuard.
- Mobile device running WireGuard.
With everything setup, we should be able to push all internet traffic from our mobile device, out through the LightSail instances. The home network will also be accessible to the remotely connected mobile device. Our WireGuard client will be able to talk to services in the home network, such as DNS, file shares, etc.
Configure WireGuard
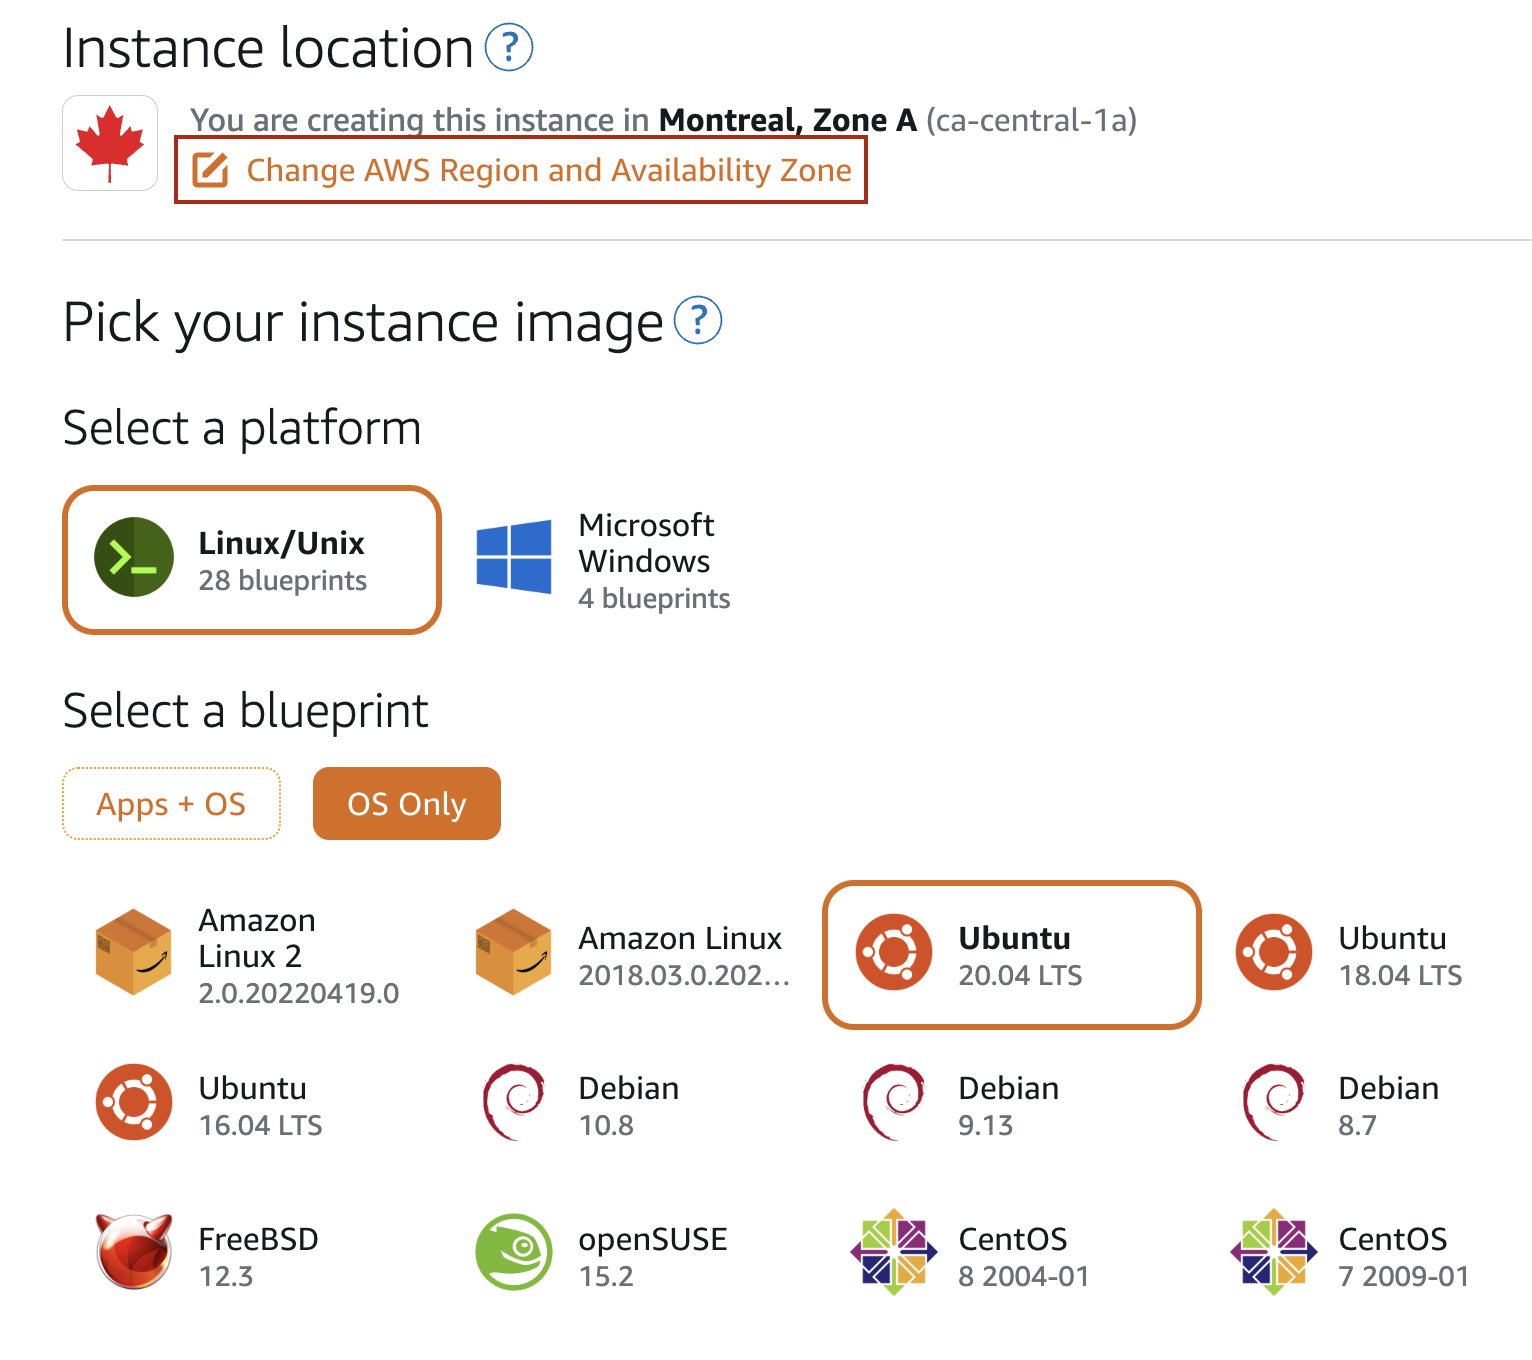
Create a new Lightsail instance: Ubuntu 20.04, 512MB Memory, 1 vCPU.
- Login to Lightsail
- Under the Instances tab, click Create Instance.
-
Select the Instance Location and OS, this will be the region where the instance will be located.
- If you intend to use this server only for VPN services, the lowest available instance plan should suffice. However, this may depend upon the traffic load you put on the server. I’d recommend starting with the lowest resource plan, continue to monitor the CPU and memory on the instance while it’s running the VPN services and increase only if the server is under constant resource stress.
- Configure the SSH Key and instance name, then Create Instance.
Configure Lightsail networking
Once the instance has been created, you would want to attach a static public IP in order to avoid the address from changing on every stop/start of the instance. There is no additional cost to using a public IP on a running instance, but an unused public IP has costs related to it. The instance also needs to have the WireGuard port open so it can accept VPN connections.
- Click on the instance from the dashboard.
- Under Networking tab, attach a public IP.
-
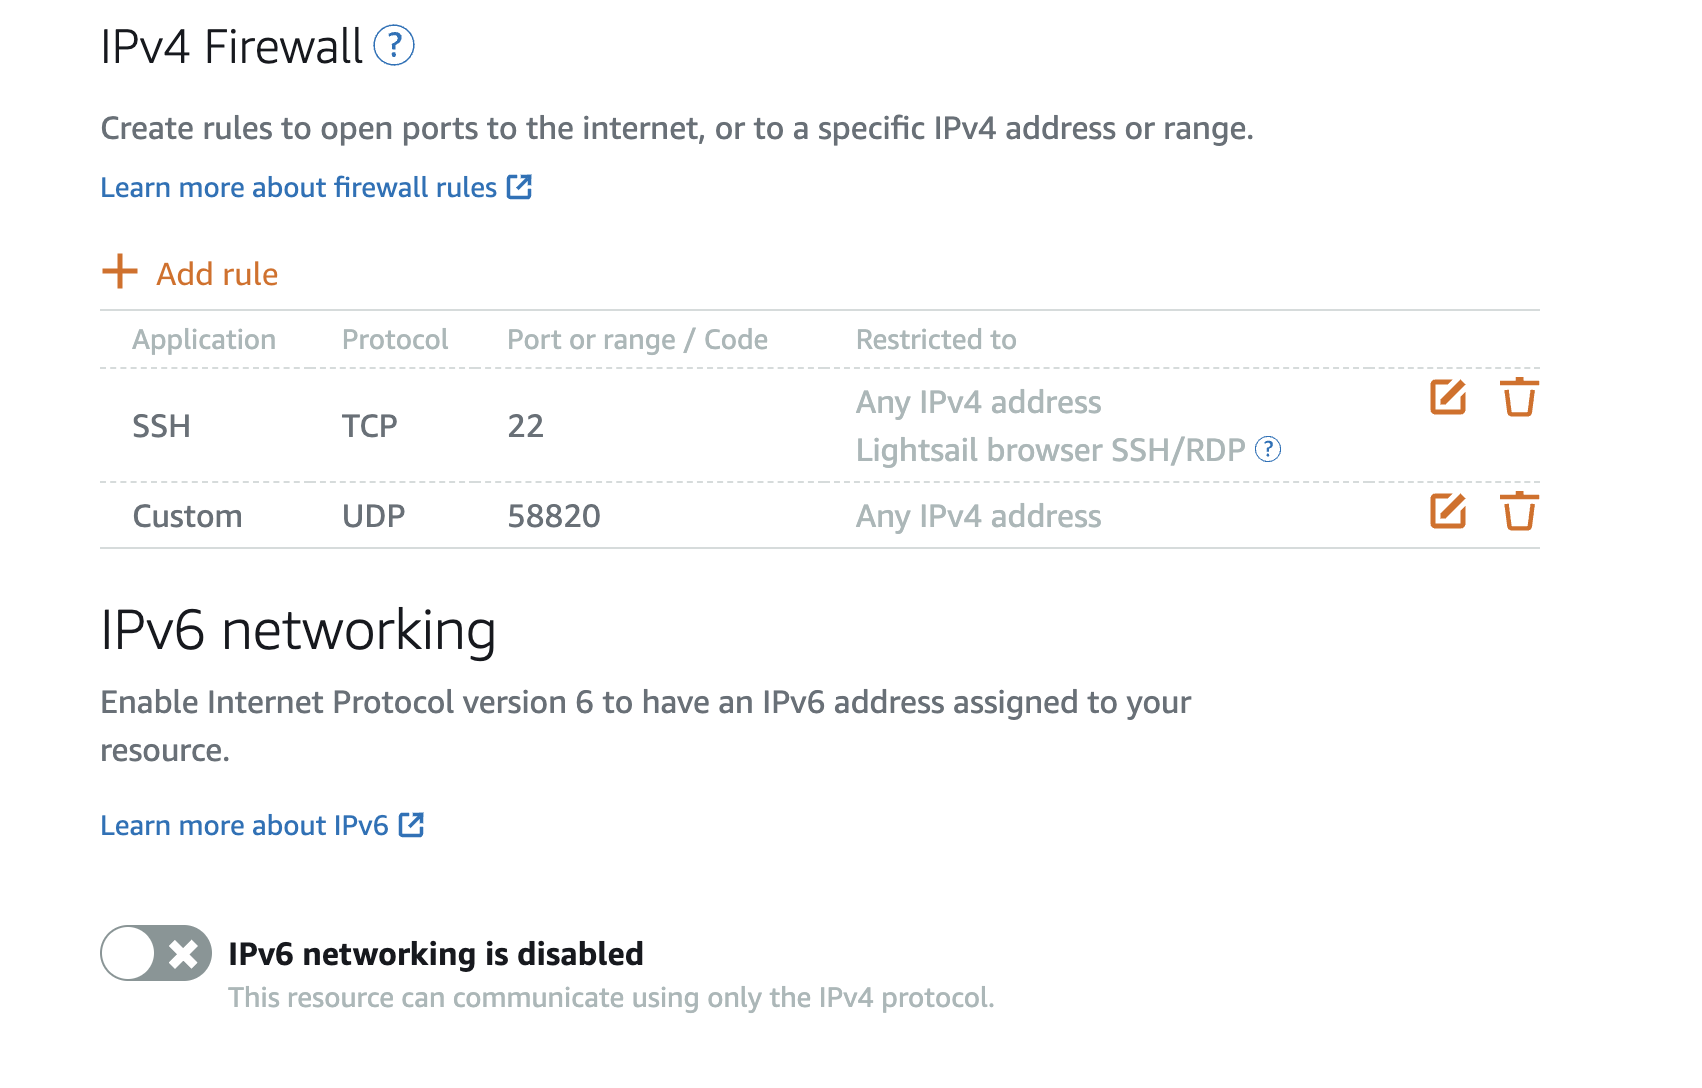
In the IPv4 Firewall section, add a rule to allow the WireGuard port, in our case we will use UDP port 58820. You may also choose to restrict SSH to your public IP only.
Install WireGuard on the server
- Login to the instance via SSH as the user
ubuntuusing it’s public IP. - Enable IPv4 forwarding.
-
Edit sysctl.conf
vi /etc/sysctl.conf -
Modify
net.ipv4.ip_forwardas below:net.ipv4.ip_forward=1
-
-
Run the following set of commands to install WireGuard. For the rest of this guide, we run commands logged in as root, so stay in the
sudo -icontext.sudo -i apt update apt install wireguard
Configure WireGuard Server
Each server/client in the WireGuard network has a key pair(public/private) which is used for authentication. The private key stays on the server that owns it, whereas the public key is added to the configuration of other nodes that need to establish a connection.
-
Generate keys for the server. The below command will store the private and public key in their corresponding files.
wg genkey | tee ~/server_prkey | wg pubkey >~/server_pubkey -
Generate keys for your first client.
wg genkey | tee ~/client1_prkey | wg pubkey >~/client1_pubkey -
Create the server and client’s configuration file. For our setup, we will use the
10.100.52.96/28subnet for the WireGuard network, assigning the first usable IP to the server and remaining for clients.cat << EOF >/etc/wireguard/wg0.conf [Interface] Address = 10.100.52.97/28 ListenPort = 58820 PrivateKey = $(cat ~/server_prkey) PostUp = iptables -t nat -A POSTROUTING -s 10.100.52.96/28 -o eth0 -j MASQUERADE PostDown = iptables -t nat -D POSTROUTING -s 10.100.52.96/28 -o eth0 -j MASQUERADE # Client 1 [Peer] PublicKey = $(cat ~/client1_pubkey) AllowedIPs = 10.100.52.98/32 EOF cat << EOF >~/wg_client.conf [Interface] Address = 10.100.52.98/28 ListenPort = 58820 PrivateKey = $(cat ~/client1_prkey) DNS = 1.1.1.1 # Server [Peer] PublicKey = $(cat ~/server_pubkey) Endpoint = SERVER_PUBLIC_IP_HERE AllowedIPs = 10.100.52.98/32 EOFPostUpandPostDowndefine the commands that are run when WireGuard comes up or goes down. This can also be set to the path of a script on the filesystem. Here, since we want to send internet traffic from our mobile device to the internet through the WireGuard server, we will need to NAT outgoing traffic to the instance’s primary ethernet adapter, as otherwise traffic will go with the WireGuard IP as source, which the upstream AWS network does not recognize. So this configuration will automatically add the NAT rules when the interface comes up, and delete the iptables NAT rule when it goes down.ListenPortis the port we want the WireGuard process to listen on.- In the
[Peer]section,Endpointsets the public address of the remote WireGuard node. For a dial-up VPN client setup, where a server has dynamic clients connecting to it, as in this guide, this setting needs to exist in the client configuration only. If the server needs to form a static tunnel to another peer, it will make sense to use theEndpointconfiguration then. - The
AllowedIPsmeans the routes we want to add for this peer. Configuring this as0.0.0.0/0means that all traffic will be sent through this peer, effectively, adding a default route. For the central WireGuard node(the Server), this should be the Client’s WG IP, and for our clients, this should either be0.0.0.0/0or aLAN subnetthat should be routed using WireGuard.
When the
AllowedIPsis set to something other than0.0.0.0/0on the client, it is called split tunneling. Essentially because we are only sending traffic for certain subnets through the WireGuard tunnel. When all traffic is routed through the WireGuard tunnel it is referred to as a full tunnel. -
The above step has now created the WireGuard configuration file. To start the WireGuard interface, it can either be done directly from the command line using the
wg-quickutility, however such a setup will require manual VPN startup on the server every time it reboots. A better option is to run WireGuard as asystemdservice. WireGuard package puts in place the systemd file automatically, so that’s left on the server is to start the WireGuard service and also make it auto-start on boot.systemctl enable wg-quick@wg0 systemctl start wg-quick@wg0 -
To check the Wireguard connection details, run:
wg show
Configure WireGuard Client
On Step. 3 of the previous section, we also created a client’s configuration file. Having this configuration on the server doesn’t make sense, the only reason it was done here was for simplicity’s sake. We can generate a QR code from the server itself and scan it to load the configuration on the client.
-
Install
qrencodeon the server.apt install qrencode -
Generate the QR code from the previously created client configuration.
qrencode -t ansiutf8 <~/wg_client.conf -
Install WireGuard on the mobile device, add a new tunnel and select the option to add a tunnel by scanning QR code. The tunnel will be added once the above is done.
At this point, all the internet traffic from the mobile device is being routed through WireGuard. This can be verified by checking it’s public IP, to do this search for something like ‘my ip’ on Google, and this should be the IP of your Lightsail instance.
Additional Notes
Adding another client to the mix is easy.
- Generate a new key pair with:
wg genkey | tee client_prkey | wg pubkey >client_pubkey - Add a new peer to the server’s configuration file and specify it’s public key WG IP address and reload the wg-quick service:
systemctl reload wg-quick@wg0 - On the client side, create a configuration file similar to the once created before, replace the private key with the newly generated one, the public key in the configuration file will remain the same as we are still connecting to the same WireGuard peer(which is the server).
Suppose the newly added client is a VPN router that has a whole home LAN behind it which you want to access through another client(mobile device). The below changes will be needed:
-
On the central server, modify the
AllowedIPsfor the peer router. Instead of only the WireGuard IP, also add the network subnet of the LAN that should be accessible. As an example, if the WireGuard peer is 10.52.100.99 and the LAN behind it is 192.168.10.0/24, it will look something like:AllowedIPs = 10.52.100.99/32, 192.168.10.0/24
The above will solve the routing on the server side in that it will route all traffic for the home LAN through the new peer, and because we are already using a full-tunnel on the mobile device, it will already be sending all it’s traffic to the central server. Next, we need to make some changes on the local server.
- Enable IPv4 forwarding on the home router.
-
Add
PostUpandPostDownto NAT when traffic is coming from WireGuard network and going to the home LAN. This will ensure that any WireGuard traffic sent to the home LAN is NAT’d to the LAN IP of the home router, so that the home resources always send reply traffic to the correct place. The home router config should look something like this:[Interface] PrivateKey = xxxxxxxxxxxxxxxxxx= Address = 10.100.52.100/32 PostUp = iptables -t nat -A POSTROUTING -s 10.100.52.96/28 -o eth0 -j MASQUERADE PostDown = iptables -t nat -D POSTROUTING -s 10.100.52.96/28 -o eth0 -j MASQUERADE ## Server [Peer] PublicKey = xxxxxxxxxxxxxxxxxx= AllowedIPs = 10.100.52.96/28 Endpoint = x.x.x.x:58820 PersistentKeepalive = 25
PersistentKeepalive may be needed if you have a router behind NAT. Assume that you want to access a home file share from your remotely connected mobile device over WireGuard. The mobile device will need to send traffic to the Lightsail server which will try to send it to the home router’s WireGuard peer. The home router then forwards it to the file share and sends reply traffic back to the mobile client through the Lightsail server. Say, the home router is behind a stateful NAT firewall, if there’s no communication between the home router and WireGuard server for some time, the underlying UDP connection will timeout at a certain point and the session on the firewall will be removed. Now, when traffic is sent from Mobile->LightSail->HomeRouter, the final stage will actually be a UDP packet containing encrypted WireGuard data that is sent from Lightsail to the public IP of home router. When the firewall receives the packet, it checks if there is an existing session, since the session already timed out, and because it is a packet coming in the direction of WAN to LAN, the firewall will drop the packet. So this will work only as long as the home router keeps sending traffic out to the server, which will keep the WireGuard session up and also allow to accept traffic initiated from other devices in the WireGuard network.
To tackle this, PersistentKeepalive can be configured. This is the number of seconds after which the WireGuard client will send a keepalive packet to the peer to keep the connection up. It is very helpful in scenarios where you have a dial-up tunnel and one router is behind NAT, but regardless of which send initiated the traffic the tunnel needs to stay up always. So setting it to a value of 25, the client will send a keepalive every 25 seconds if there is no traffic. This will keep the WireGuard session up at the firewall level regardless of there being traffic or not.
Clean-Up
We created a few files on the WireGuard server that are no longer needed. To delete those:
rm ~/{server_pub,server_pr,client1_pr,client1_pub}key
rm ~/wg_client.conf
Conclusion
WireGuard is an easy to setup and robust VPN protocol. Hosting it on Lightsail makes possible a very low-cost and reliable VPN setup. Anytime I am not on my home Wi-Fi, my device automatically turns on WireGuard using the ‘On-Demand’ functionality, bringing up a full tunnel and routing all traffic through the WireGuard server. So regardless of whether I’m on a public Wi-Fi or LTE, I can be assured that all my traffic is WireGuard encrypted and is secure from any malicious actors in the local network.
